> ## Documentation Index
> Fetch the complete documentation index at: https://docs.therootnetwork.com/llms.txt
> Use this file to discover all available pages before exploring further.
# Create a Fungible Asset
Fungible asset is an essential component of any blockchain. The Root Network comes with pre-built pallets `asset` and `assetsExt` that make fungible asset management easy and intuitive, highly optimized for efficiency and stable transaction fees. Additionally, fungible assets on The Root Network are ERC-20 compatible, once created they are tradable on both native and EVM layers.
The following guide will walk you through how to create, mint, and manage a fungible asset using The Root Network Portal.
## Requirements
* An account with `100 ROOT` to reserve the asset in the chain storage and at least `0.1 XRP` for initial asset creation.
## Instructions
### Step 1: Connect an account with the Portal
1. Go to the [Portal Account page](https://portal.rootnet.live/#/accounts) and select **From Ethereum Wallet**.
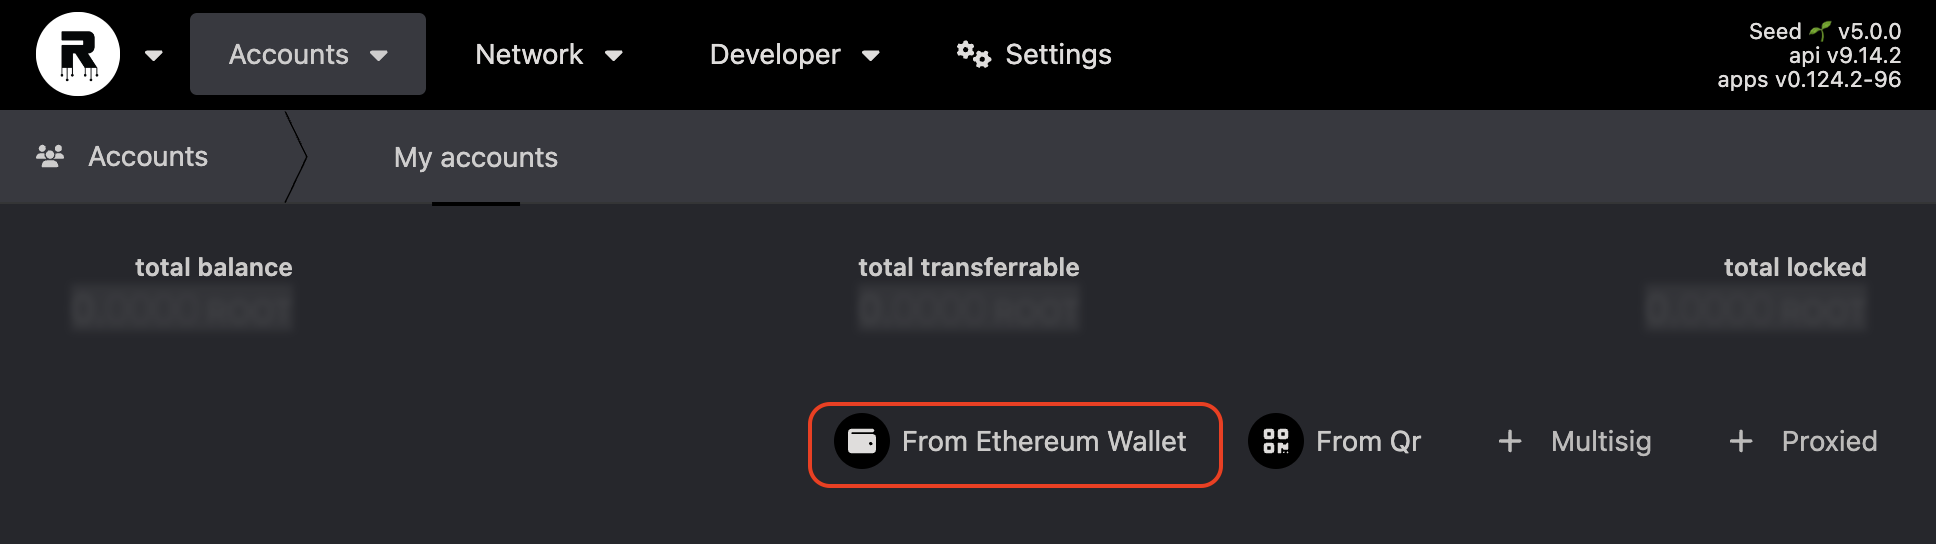 2. Select an account you wish to be the asset owner, when the "Connect with MetaMask" dialog opens up, click **Next**.
3. Confirm your account appears on the Account page under the *Extensions* section.
### Step 2: Create an asset
1. Go to the [Portal Extrinsics page](https://portal.rootnet.live/#/extrinsics) and input the values as per the screenshot below:
2. Select an account you wish to be the asset owner, when the "Connect with MetaMask" dialog opens up, click **Next**.
3. Confirm your account appears on the Account page under the *Extensions* section.
### Step 2: Create an asset
1. Go to the [Portal Extrinsics page](https://portal.rootnet.live/#/extrinsics) and input the values as per the screenshot below:
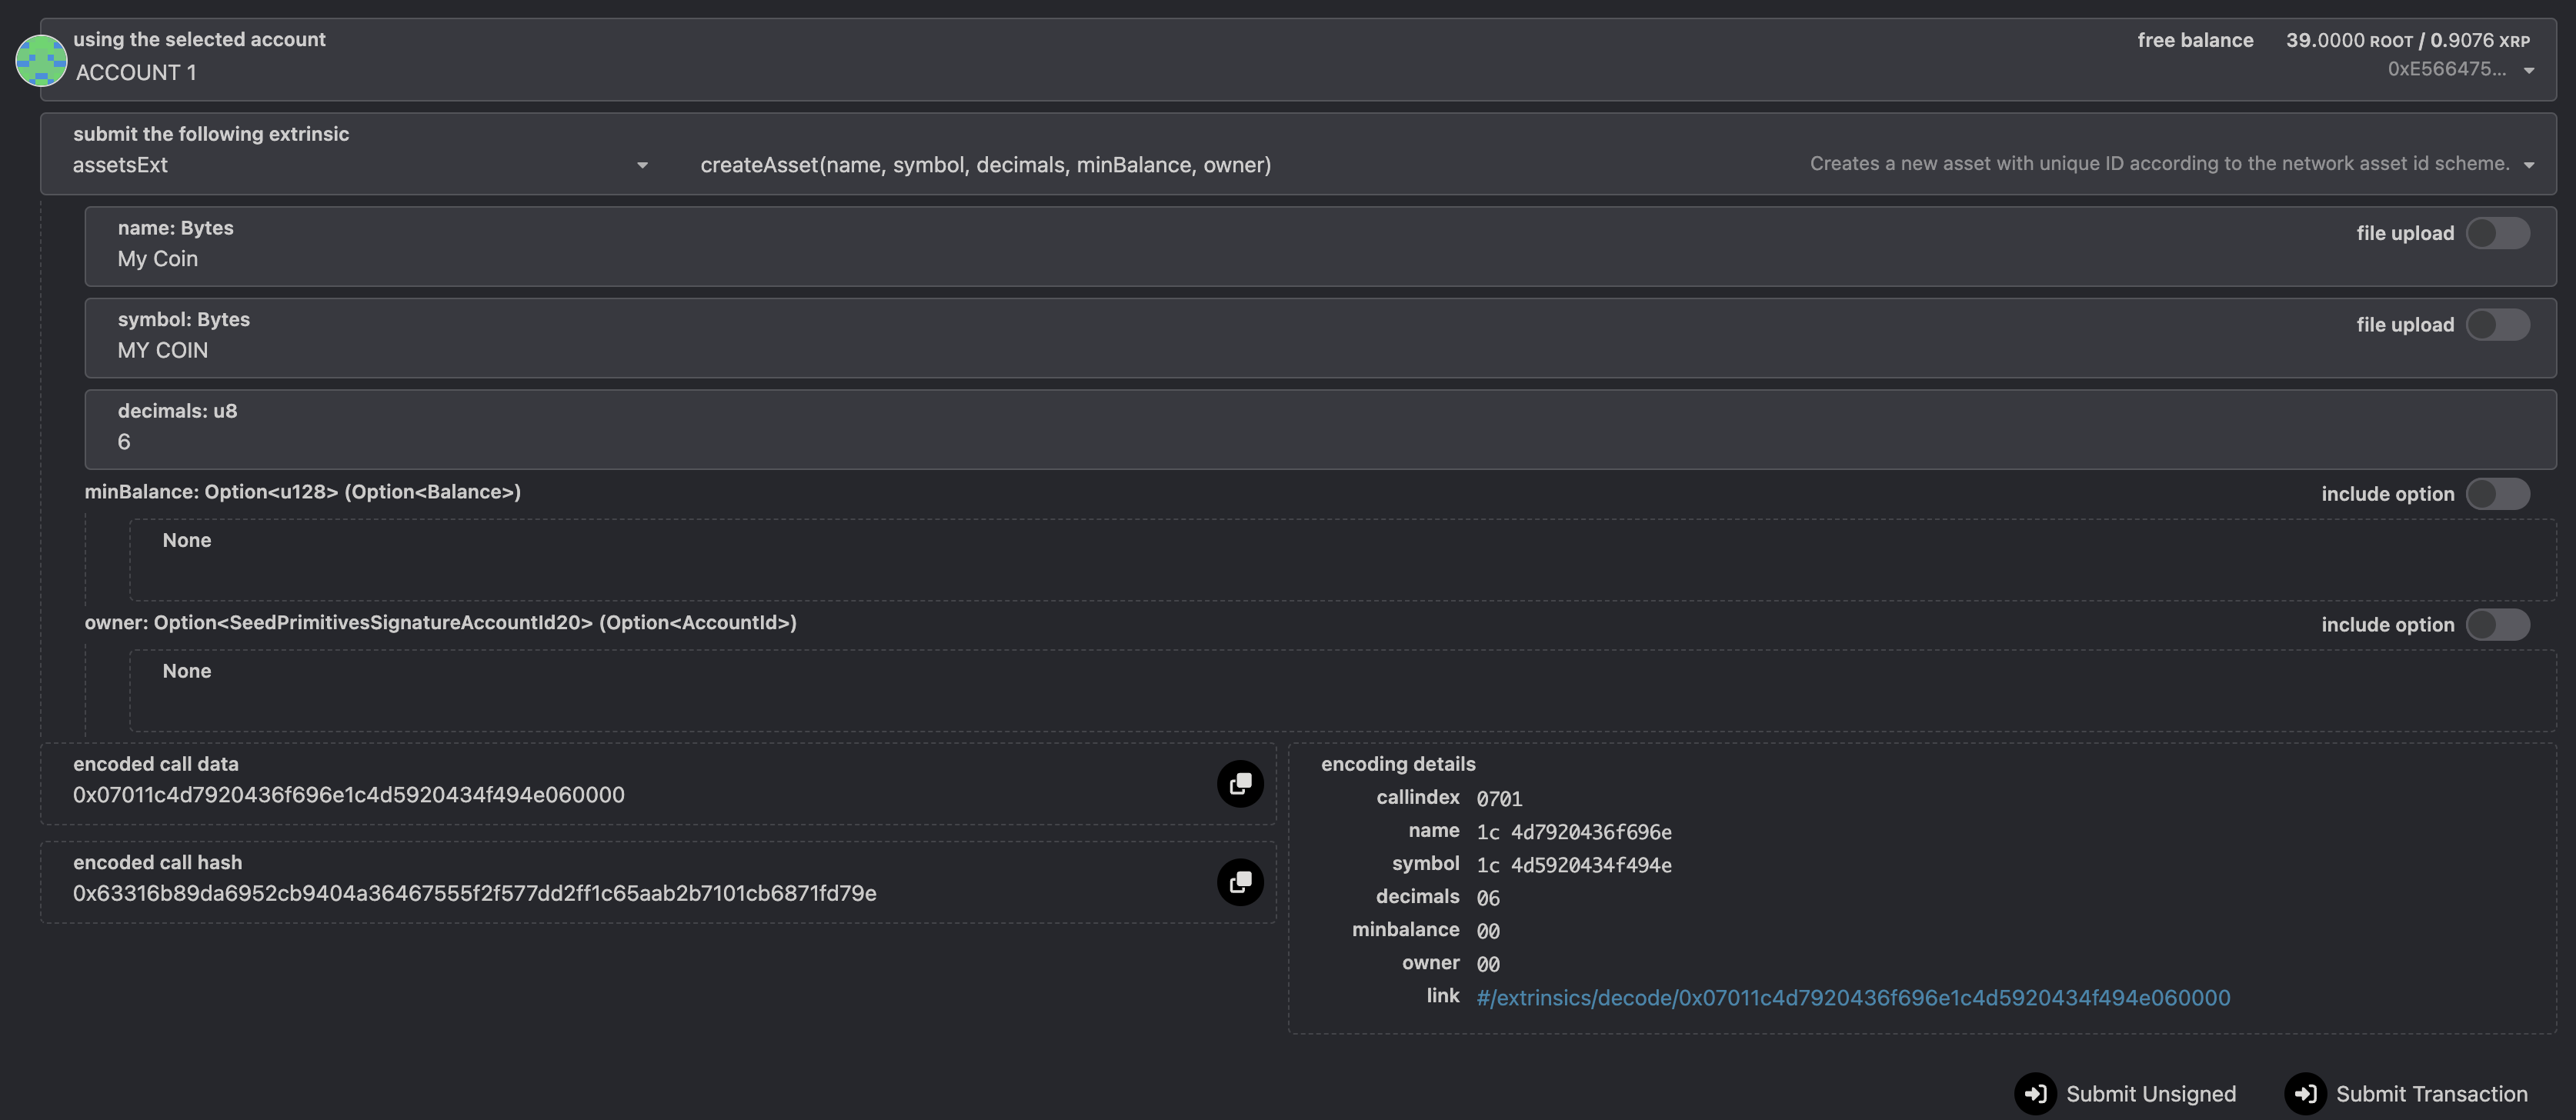 * Extrinsic: `assetsExt.createAsset()`
* Parameters:
* `name`: The name of the asset.
* `symbol`: The symbol of the asset.
* `decimals`: The number of decimals in the asset, max is 18 decimals.
* `minBalance` (optional): The minimum balance of this new asset that any single account must have. If an account’s balance is reduced below this, then it collapses to zero.
* `owner` (optional): The owner of the asset, defaults to the caller.
2. Click **Submit Transaction** when done and select **Sign** when prompted by MetaMask.
3. The transaction is confirmed when a green tick appears on the top right corner.
### Step 3: Confirm asset creation
* Go to [the Portal Assets page](https://portal.rootnet.live/#/assets) and confirm your asset has been created.
* Extrinsic: `assetsExt.createAsset()`
* Parameters:
* `name`: The name of the asset.
* `symbol`: The symbol of the asset.
* `decimals`: The number of decimals in the asset, max is 18 decimals.
* `minBalance` (optional): The minimum balance of this new asset that any single account must have. If an account’s balance is reduced below this, then it collapses to zero.
* `owner` (optional): The owner of the asset, defaults to the caller.
2. Click **Submit Transaction** when done and select **Sign** when prompted by MetaMask.
3. The transaction is confirmed when a green tick appears on the top right corner.
### Step 3: Confirm asset creation
* Go to [the Portal Assets page](https://portal.rootnet.live/#/assets) and confirm your asset has been created.
 ### Step 4: Mint asset to account
1. Go to the [Portal Extrinsics page](https://portal.rootnet.live/#/extrinsics) and input the values as per the screenshot below:
### Step 4: Mint asset to account
1. Go to the [Portal Extrinsics page](https://portal.rootnet.live/#/extrinsics) and input the values as per the screenshot below:
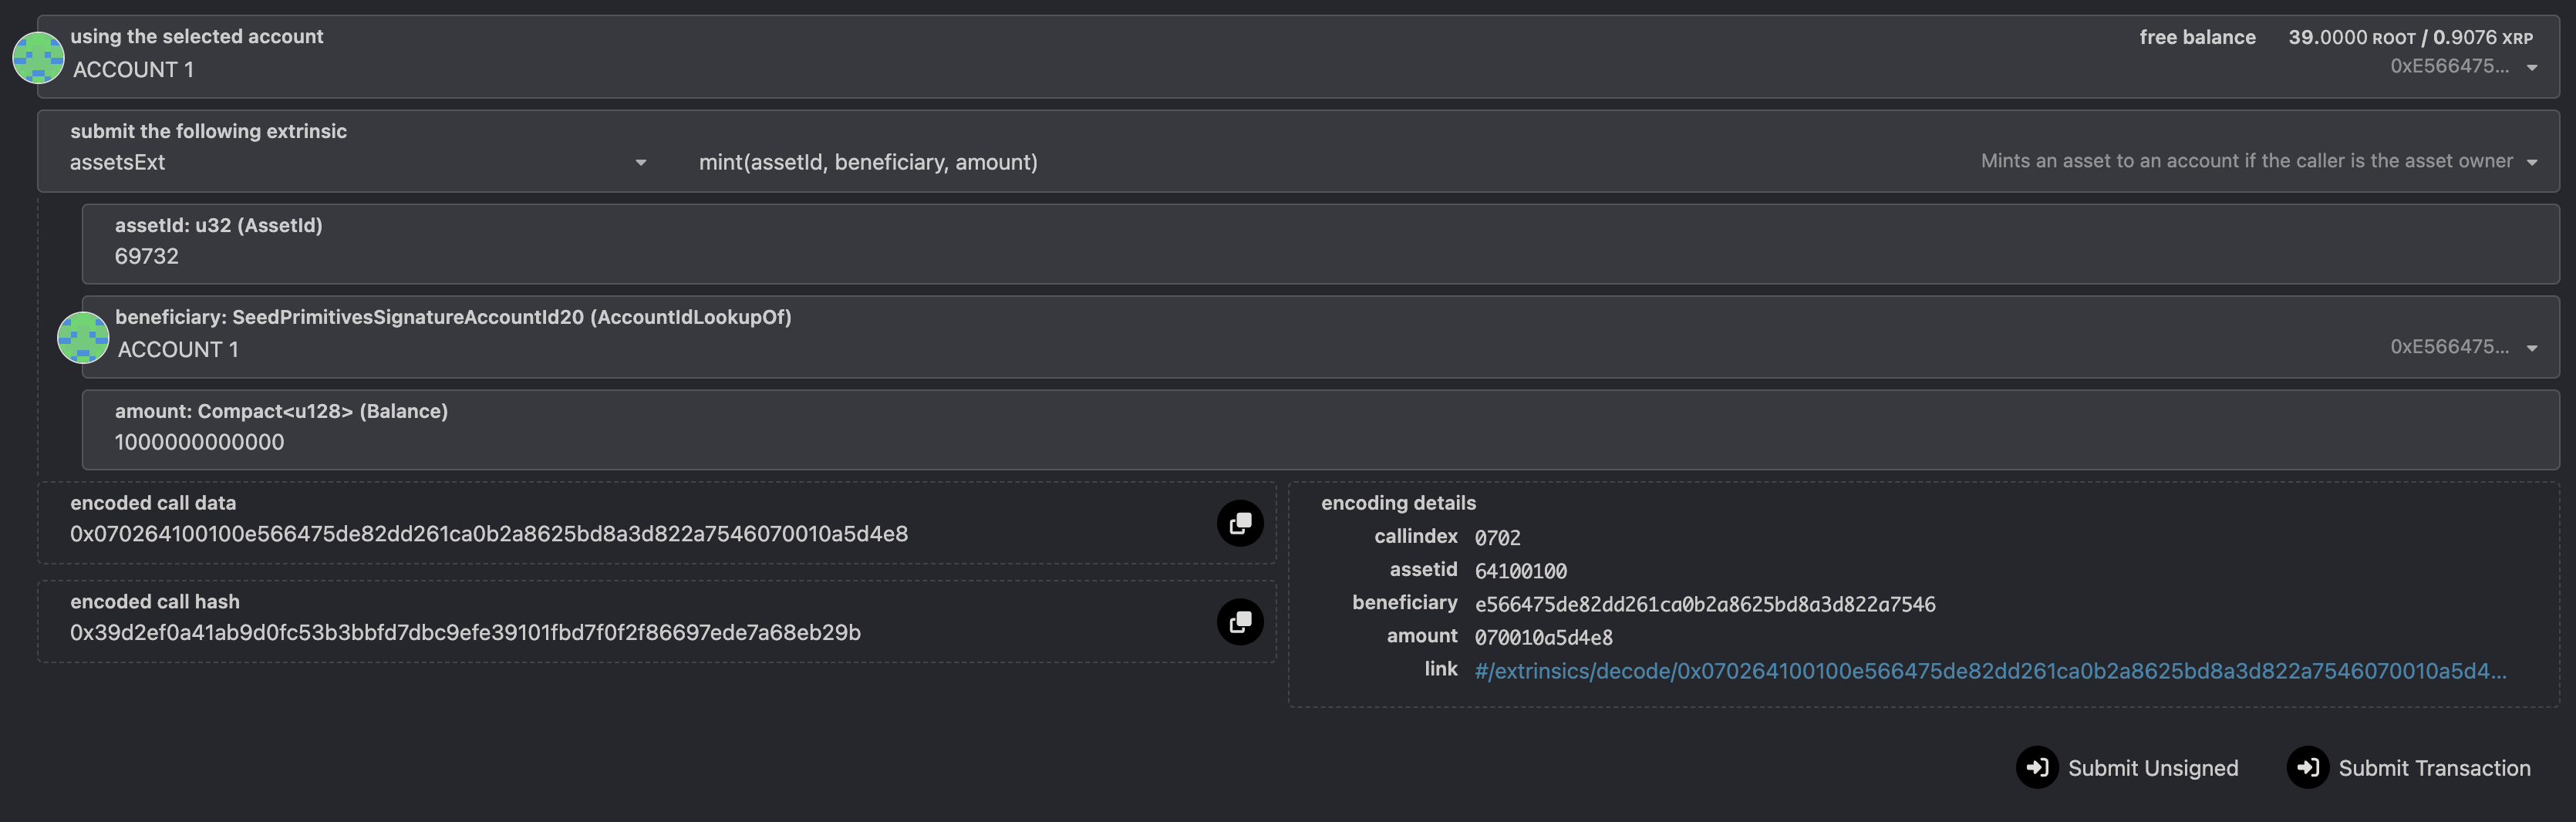 * Extrinsic: `assetsExt.mint()`
* Parameters:
* `assetId`: The asset ID to mint. The caller must be the owner of the asset.
* `beneficiary`: The account to receive the minted tokens.
* `amount`: The amount to mint in the smallest unit. If your asset has `6` decimals, to mint 1 million tokens, it will be `1000000000000` (with 12 zeros).
2. Click **Submit Transaction** when done and select **Sign** when prompted by MetaMask.
3. The transaction is confirmed when a green tick appears on the top right corner.
### Step 5: Transfer asset to account
1. Go to the [Portal Extrinsics page](https://portal.rootnet.live/#/extrinsics) and input the values as per the screenshot below:
* Extrinsic: `assetsExt.mint()`
* Parameters:
* `assetId`: The asset ID to mint. The caller must be the owner of the asset.
* `beneficiary`: The account to receive the minted tokens.
* `amount`: The amount to mint in the smallest unit. If your asset has `6` decimals, to mint 1 million tokens, it will be `1000000000000` (with 12 zeros).
2. Click **Submit Transaction** when done and select **Sign** when prompted by MetaMask.
3. The transaction is confirmed when a green tick appears on the top right corner.
### Step 5: Transfer asset to account
1. Go to the [Portal Extrinsics page](https://portal.rootnet.live/#/extrinsics) and input the values as per the screenshot below:
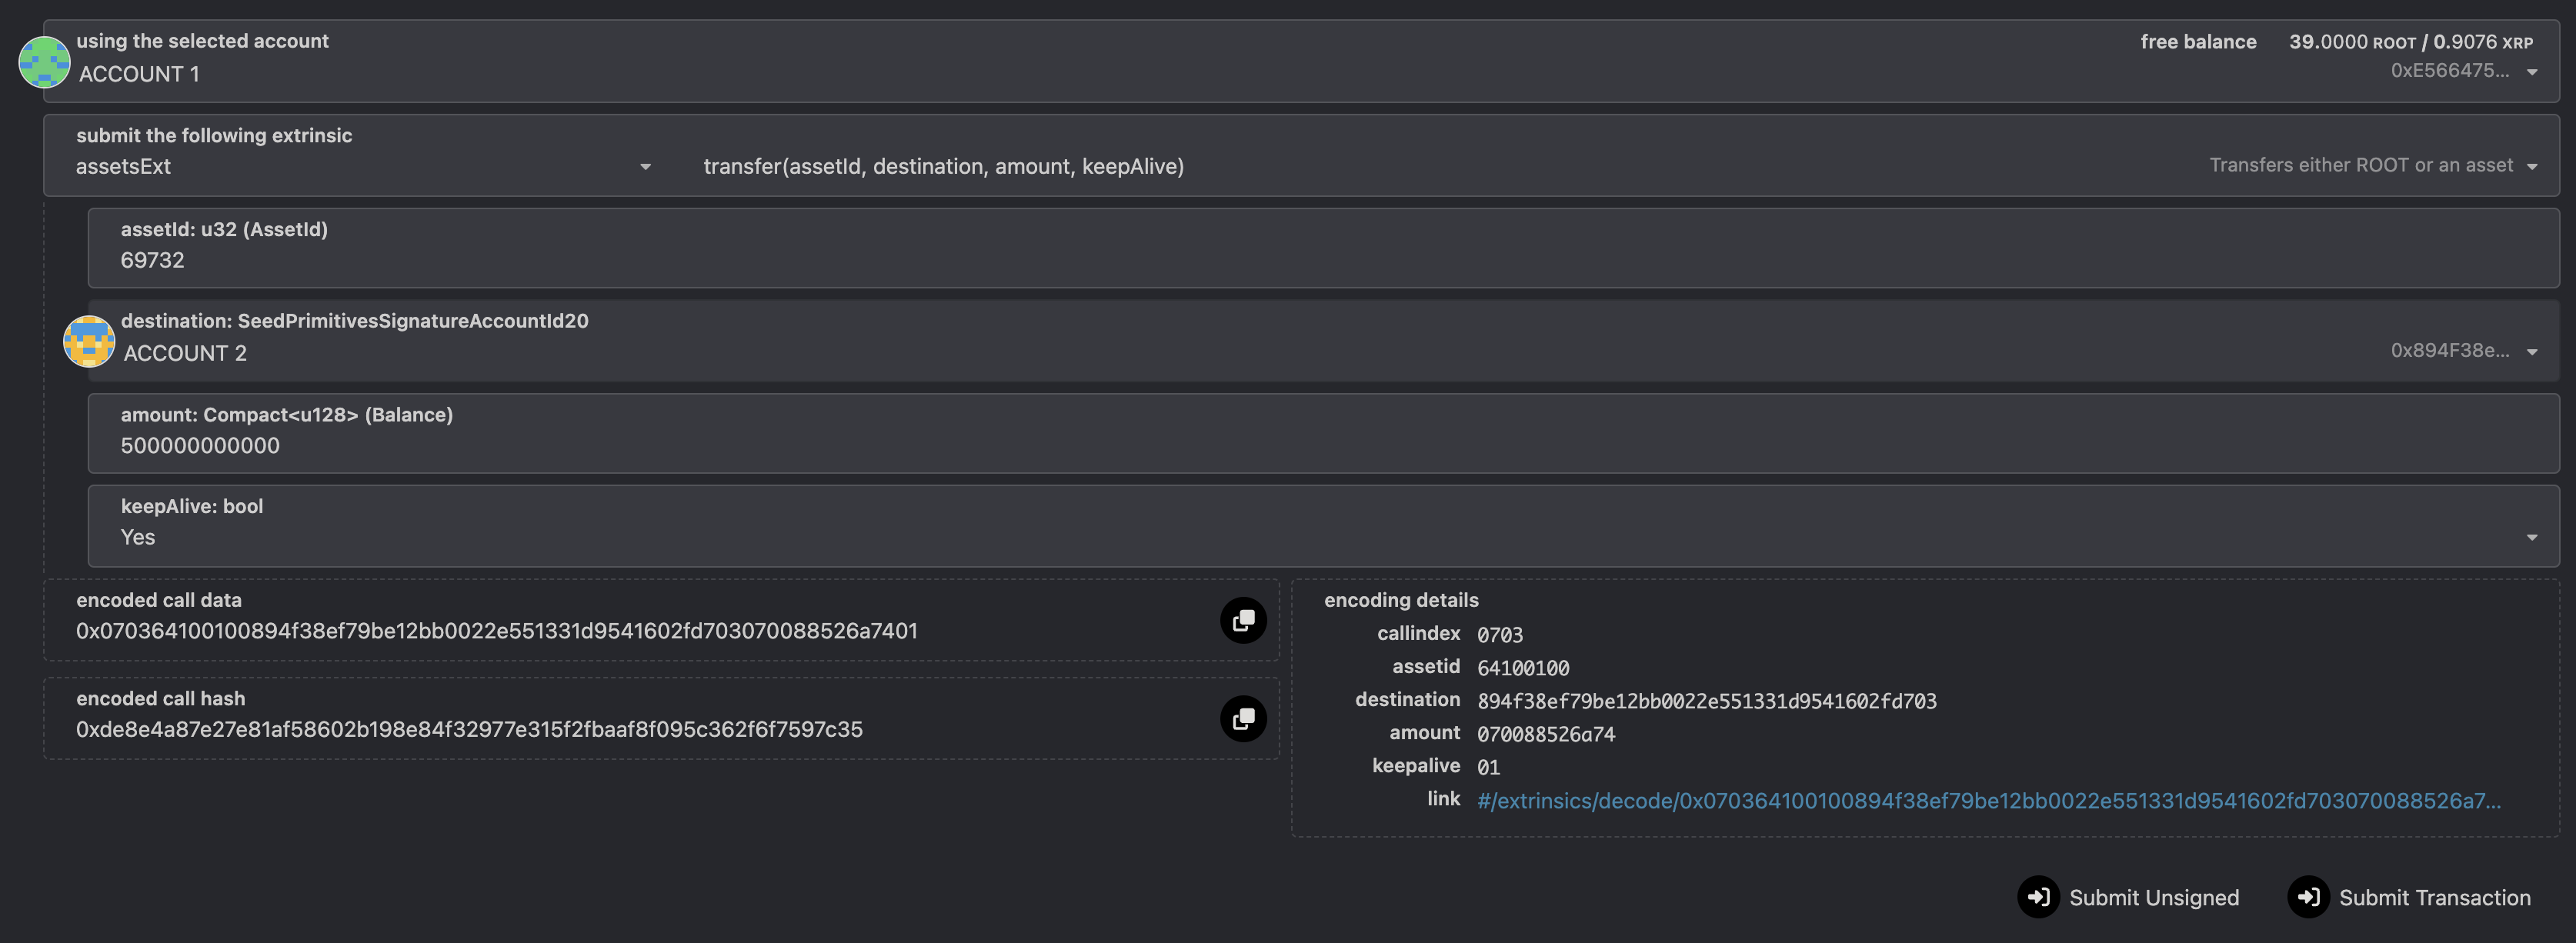 * Extrinsic: `assetsExt.transfer()`
* Parameters:
* `assetId`: The asset ID to mint. The caller must be the owner of the asset.
* `destination`: The account to be transferred to.
* `amount`: The amount to transfer in the smallest unit. If your asset has `6` decimals, to mint 1 million tokens, it will be `1000000000000` (with 12 zeros).
* `keepAlive`: The flag to ensure caller still have enough existence balance.
2. Click **Submit Transaction** when done and select **Sign** when prompted by MetaMask.
3. The transaction is confirmed when a green tick appears on the top right corner.
## Use FuturePass
It's possible to have your FuturePass account own an asset instead of a standard account. Follow the above steps but wrap all of the extrinsics in the `futurepass.proxyExtrinsic`, as per the screenshot:
* Extrinsic: `assetsExt.transfer()`
* Parameters:
* `assetId`: The asset ID to mint. The caller must be the owner of the asset.
* `destination`: The account to be transferred to.
* `amount`: The amount to transfer in the smallest unit. If your asset has `6` decimals, to mint 1 million tokens, it will be `1000000000000` (with 12 zeros).
* `keepAlive`: The flag to ensure caller still have enough existence balance.
2. Click **Submit Transaction** when done and select **Sign** when prompted by MetaMask.
3. The transaction is confirmed when a green tick appears on the top right corner.
## Use FuturePass
It's possible to have your FuturePass account own an asset instead of a standard account. Follow the above steps but wrap all of the extrinsics in the `futurepass.proxyExtrinsic`, as per the screenshot:
 ## Use Asset on EVM
Once the asset is created in Step 2, you can convert your asset ID to an ERC-20 compatible format to use it on the EVM layer.
The native asset has the following ERC-20 address convention:
```
0xCCCCCCCC[asset-id in hex padded 0 up to 8 chars]000000000000000000000000
```
For example, if your asset id is `69372`, which is `11064` in hex or `00011064` with padded `"0"` up to 8 characters, your asset ERC-20 address will be:
```
0xCCCCCCCC00011064000000000000000000000000
```
You can verify this by importing the above address to MetaMask, make sure you add The Root Network to MetaMask using the details [here](/build/connecting-to-the-root-network).
## Use Asset on EVM
Once the asset is created in Step 2, you can convert your asset ID to an ERC-20 compatible format to use it on the EVM layer.
The native asset has the following ERC-20 address convention:
```
0xCCCCCCCC[asset-id in hex padded 0 up to 8 chars]000000000000000000000000
```
For example, if your asset id is `69372`, which is `11064` in hex or `00011064` with padded `"0"` up to 8 characters, your asset ERC-20 address will be:
```
0xCCCCCCCC00011064000000000000000000000000
```
You can verify this by importing the above address to MetaMask, make sure you add The Root Network to MetaMask using the details [here](/build/connecting-to-the-root-network).